 EN


Light steel keel framing has become the preferred solution for modern construction projects seeking durability, precision, and cost-effective building systems. This lightweight yet robust framework provides the structural foundation for suspended ceilings, partition walls, and interior finishing systems across commercial, industrial, and residential applications. Understanding how to properly install light steel keel framing ensures structural integrity, alignment accuracy, and long-term performance. Whether you're a construction professional, facility manager, or project coordinator, mastering light steel keel installation techniques is essential for successful project delivery.
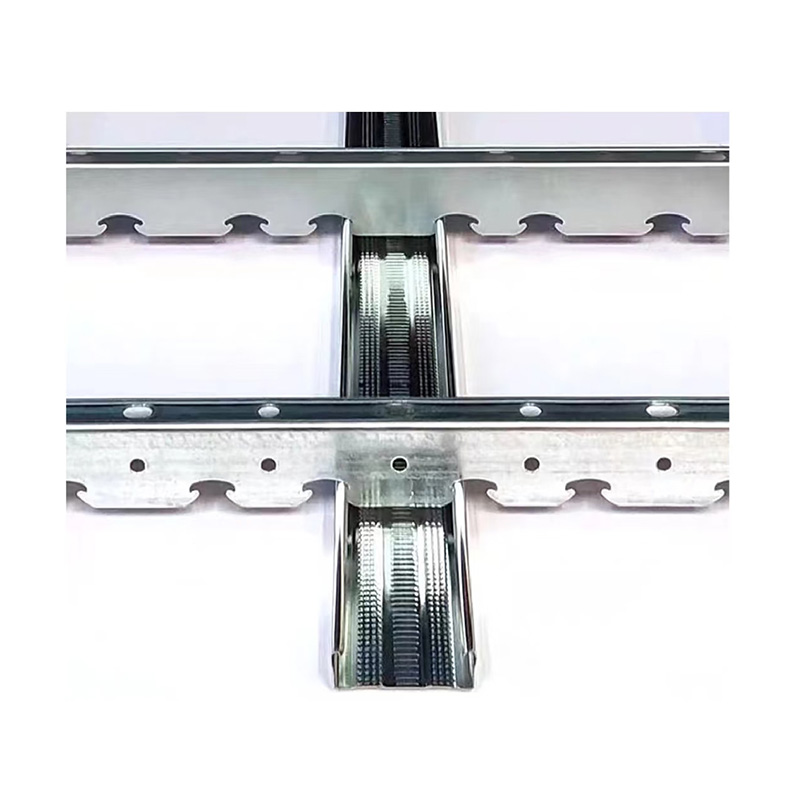
The installation process for light steel keel requires careful planning, precise measurement, and methodical execution. Unlike traditional framing materials, light steel keel offers superior strength-to-weight ratio, making it easier to handle while maintaining exceptional load-bearing capacity. This guide walks you through every critical stage of light steel keel installation, from site preparation through final fastening, ensuring your project meets industry standards and design specifications.
Preparing Your Project Site for Light Steel Keel Installation
Assessing Structural Requirements and Planning Light Steel Keel Layout
Before beginning any light steel keel framing work, conduct a thorough assessment of your project site and structural requirements. Review architectural drawings, engineering specifications, and load calculations to understand the exact light steel keel configuration needed for your application. Measure the installation area precisely, mark reference lines, and identify all obstructions, mechanical systems, and electrical conduits that may affect light steel keel placement. Proper planning prevents costly rework and ensures that your light steel keel framework aligns perfectly with surrounding building systems.
Gathering Tools, Materials, and Safety Equipment for Light Steel Keel Work
Assemble all necessary tools before beginning light steel keel installation, including tape measures, levels, laser alignment tools, drill drivers, and pneumatic fasteners. Ensure you have adequate quantities of light steel keel components, hangers, fasteners, and connection hardware. Inspect all light steel keel materials for damage, corrosion, or deformation before installation begins. Equip yourself and your team with appropriate personal protective equipment, including safety glasses, gloves, hard hats, and fall protection when working at heights. Proper preparation of light steel keel materials and work area minimizes delays and ensures worker safety throughout the project.
Installing the Main Light Steel Keel Framework
Establishing Reference Lines and Mounting Points for Light Steel Keel
Begin light steel keel installation by establishing accurate reference lines using laser levels or chalk lines. Mark the exact height where your light steel keel framework will be installed, ensuring compliance with design specifications and clearance requirements. Locate mounting points on existing structure, whether concrete, steel beams, or walls, and mark positions for light steel keel hangers or brackets. Use a level instrument to verify that reference lines are perfectly horizontal across the entire installation area. Accurate reference lines ensure that all light steel keel components align properly and create a level, stable framework that will support your ceiling, walls, or other structural systems.
Securing Light Steel Keel Hangers and Suspension Components
Install hangers designed specifically for light steel keel suspension according to your project's structural specifications. Bolt or weld hangers securely to existing structural elements, following manufacturer guidelines for spacing and load capacity. Each hanger must support the calculated weight of your complete light steel keel framework plus any additional loads from mechanical systems, fixtures, or finishing materials. Thread all light steel keel hangers with adjustment capability to allow fine-tuning of height during installation. Verify that light steel keel hangers are firmly attached and cannot move vertically or horizontally before proceeding to position the framework components themselves.
Positioning and Fastening Light Steel Keel Components
Installing Primary and Secondary Light Steel Keel Members
Begin positioning primary light steel keel members along the reference lines established during the preparation phase. Carefully lift each light steel keel component into position, ensuring it aligns perfectly with reference marks and neighboring components. Use temporary bracing or support during light steel keel installation to prevent accidental displacement or misalignment. Once primary light steel keel components are properly positioned, install secondary members perpendicular to create a complete framework grid. Maintain consistent spacing between light steel keel members according to design specifications, typically ranging from 16 to 24 inches on center depending on your application and load requirements.
Securing Connections and Ensuring Light Steel Keel Alignment
Fasten light steel keel components using appropriate fastening methods such as bolts, self-drilling screws, or welding as specified by engineering design. Apply fasteners at every connection point to create a rigid, integrated light steel keel structure that distributes loads uniformly. Use a level instrument frequently during light steel keel fastening to verify that components remain perfectly horizontal and vertical throughout installation. Make fine adjustments to hanger height as needed to ensure that all light steel keel members align properly before final tightening. Once all fasteners are tightened and light steel keel alignment is verified, inspect the entire framework for gaps, misalignment, or loose components that could compromise structural performance.
Quality Control and Final Light Steel Keel Installation Steps
Conducting Inspection and Load Testing for Light Steel Keel Frameworks
After completing installation of your light steel keel framework, conduct a comprehensive inspection to verify structural integrity and compliance with project specifications. Check all fastener connections to ensure they are tight, and inspect light steel keel components for any visible damage, bending, or corrosion that may have occurred during handling or installation. Perform visual load tests by carefully applying moderate weight or pressure to light steel keel framework sections, observing for any deflection, creaking, or movement that would indicate inadequate support. Document all inspection findings and corrective actions taken during light steel keel installation for project records and future reference.
Preparing Light Steel Keel Framework for Finishing and System Integration
Once light steel keel framework passes all quality inspections, prepare the installation for finishing materials, mechanical systems, and other building components. Install any required fire-rated encasement, insulation, or protective coatings on exposed light steel keel elements according to building code requirements. Coordinate with mechanical, electrical, and plumbing contractors to route their systems around light steel keel components without compromising either the framework or utility installations. Ensure all light steel keel framework connections are accessible for future maintenance, inspection, or system modifications. Proper preparation of your light steel keel installation enables seamless integration with other building systems and reduces costly rework during later construction phases.
FAQ
What are the main advantages of using light steel keel for framing applications?
Light steel keel offers superior strength-to-weight ratio compared to traditional wood or other materials, making it easier to transport and install while maintaining excellent load-bearing capacity. Light steel keel resists moisture, fire, and pest damage, providing long-term durability and minimal maintenance requirements. Additionally, light steel keel components maintain consistent dimensions and straightness, enabling precise alignment and professional-quality finished products that exceed performance standards.
How do I calculate the proper spacing and support for light steel keel components?
Spacing and support calculations for light steel keel depend on the specific application, total design load, and span distance between support points. Consult engineering drawings and manufacturer specifications to determine correct hanger spacing, typically ranging from 2 to 4 feet on center for most suspended ceiling light steel keel applications. Calculate total load by adding the weight of light steel keel framework itself, finishing materials, mechanical systems, and any dynamic loads applicable to your project, then verify that hangers and connections can safely support the calculated load with appropriate safety factors.
Can light steel keel be used in outdoor or moisture-prone environments?
While light steel keel itself resists rust and corrosion better than many materials, outdoor or highly moisture-prone installations require protective coatings, galvanizing, or stainless steel light steel keel components to ensure long-term durability. Always specify appropriate material grades and protective finishes for light steel keel used in challenging environmental conditions, and consult structural engineers to confirm that chosen light steel keel materials meet the requirements of your specific installation environment.