 EN


A t-grid suspended ceiling system forms the structural backbone of modern commercial and residential interiors, providing both functional support and aesthetic appeal. Installing a t-grid correctly ensures your suspended ceiling remains stable, level, and visually professional for years to come. This essential guide walks you through every step of the t-grid installation process, from initial planning through final adjustment, helping you achieve professional-quality results whether you're working on a single room or a large-scale project.

Understanding the components and layout of a t-grid system before installation prevents costly mistakes and rework. The t-grid framework consists of main runners, cross tees, and wall angles that work together to suspend ceiling tiles securely. Proper planning, accurate measurements, and attention to detail transform the t-grid installation from a challenging task into a manageable project that delivers professional results and long-term performance.
Planning Your T-Grid Installation
Measuring and Layout Preparation
Before you begin the t-grid installation, measure your ceiling space carefully and plan your layout to minimize cutting and waste. Start by finding the center point of your room, then work outward to ensure balanced tile appearance on all sides. Mark the location of main runners on the wall using a chalk line and level, positioning them perpendicular to the length of your room. For a t-grid system, spacing main runners typically ranges from forty-eight to sixty inches apart, depending on tile size and load requirements. Mark cross tee positions at intervals, usually forty-eight or twenty-four inches, creating a grid pattern before hanging anything.
Preparing Wall Angles and Support Points
Installing wall angles along the perimeter of your room creates the foundation for your t-grid framework. Use a laser level or water level to mark a level line around all four walls where the top of your wall angles will sit. This line determines the height of your entire suspended ceiling, so accuracy here prevents problems throughout your t-grid installation. Secure wall angles firmly to studs or masonry using appropriate fasteners, ensuring they remain perfectly level. Check every few feet with a level tool to catch any deviations before proceeding with the t-grid framework installation.
Hanging Main Runners and Cross Tees
Installing Main Runners for Stability
Main runners form the primary load-bearing elements of your t-grid system, requiring precise installation for optimal performance. Install hanger wires first, attaching them to ceiling joists or structural supports above at intervals specified for your t-grid configuration. Typically, hanger wires suspend main runners every forty to forty-eight inches along their length. Slip main runners into hanger wire supports, then adjust each wire until the main runner sits perfectly level. Level each main runner individually, then check alignment between adjacent runners to ensure your t-grid remains even across the entire ceiling space. A level t-grid installation prevents tiles from shifting and maintains professional appearance.
Positioning Cross Tees and Secondary Grid
Cross tees interlock with main runners to complete your t-grid framework and support ceiling tiles. Insert cross tees into the slots on main runners at marked intervals, typically every forty-eight or twenty-four inches depending on your t-grid design. Ensure cross tees sit flat and level within the main runner slots without forcing or bending them. Check that cross tees remain perpendicular to main runners, using a carpenter's square at several points to verify alignment. Proper cross tee installation ensures your t-grid maintains rigidity and prevents tile sagging or movement. Stagger joints between adjacent cross tees to strengthen the overall t-grid structure.
Leveling, Adjusting, and Finalizing Installation
Achieving Final Level and Alignment
After installing all primary t-grid components, conduct a comprehensive leveling check across the entire suspended ceiling system. Use a laser level or transit level to verify that all points within your t-grid sit at the same height, making small adjustments to hanger wires as needed. Small deviations compound across large ceiling areas, so address any variations immediately rather than waiting until tiles are installed. Pay special attention to corners and edges where your t-grid meets wall angles. A properly leveled t-grid installation ensures tiles sit evenly and prevents visible gaps or sloping appearance that detracts from room aesthetics.
Testing Stability and Load Capacity
Before installing ceiling tiles, test your t-grid installation by applying gentle pressure at various points to confirm the system remains rigid. Press upward on cross tees and downward on main runners, listening for creaks or feeling for excessive movement. t-grid systems should feel solid and immobile, indicating proper hanger wire tension and secure fastening. Check that no hanger wires have loosened during installation and that all wire connections remain tight. Stable t-grid installation prevents future settling, squeaking, or tile failure. Verify that your t-grid system meets building codes and supports specified tile weights before proceeding to tile installation.
Cutting and Fitting Edge Tiles
Edge tiles complete your t-grid installation and frame the suspended ceiling professionally. Measure the distance from wall angle to the first complete cross tee, then cut tiles to fit precisely in these border areas. Use a sharp utility knife and straightedge to cut tiles cleanly, creating finished edges that align flush with wall angles. Install trimmed tiles into the t-grid framework, ensuring they rest securely on the flanges of main runners and cross tees. Properly fitted edge tiles prevent visible framework at room edges and create a polished, professional appearance that completes your t-grid installation project.
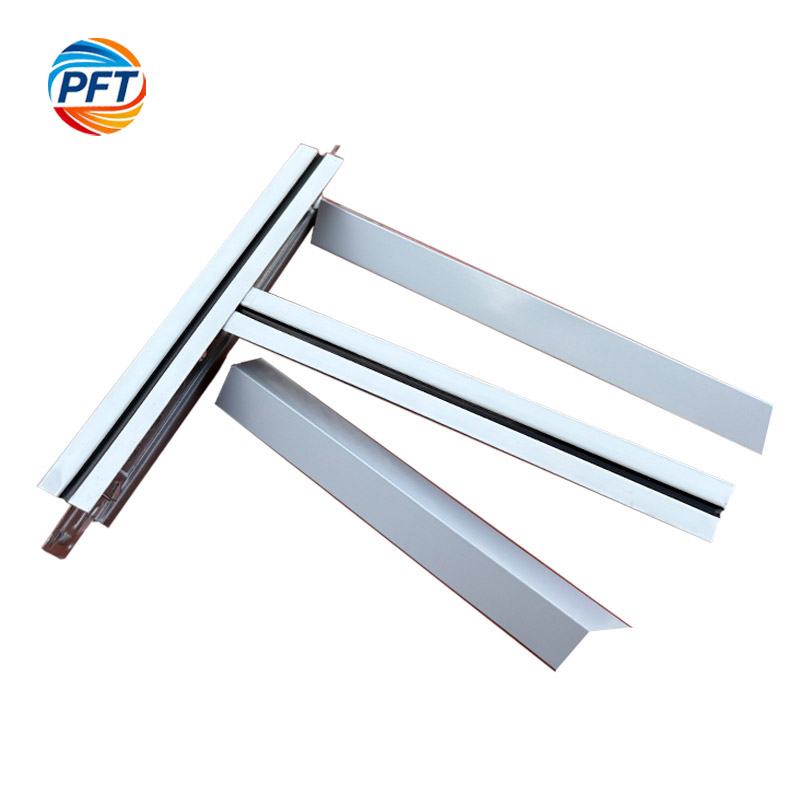
FAQ
What spacing should main runners maintain in a t-grid system?
Main runners in a t-grid suspended ceiling typically space forty-eight to sixty inches apart, with forty-eight inches being most common in residential and light commercial applications. The specific spacing depends on ceiling tile dimensions, the weight they must support, and local building codes. Check manufacturer specifications for your particular t-grid components to determine optimal main runner spacing for your project. Closer spacing provides greater support for heavier loads or larger tiles, while standard spacing works well for typical twelve-by-twelve-inch tiles.
How do I ensure my t-grid installation remains level across the entire ceiling?
Use a laser level or transit level to check multiple points across your t-grid installation, marking the same elevation line around all four walls before beginning work. Adjust hanger wire tension systematically, raising or lowering main runners until they align perfectly with this reference line. Check cross tees with a carpenter's square to maintain perpendicularity with main runners. Make small adjustments throughout the t-grid installation process rather than attempting major corrections after all components are installed. A level t-grid installation prevents tile misalignment and ensures professional appearance.
What fastening method works best when attaching wall angles for t-grid installations?
Wall angles should attach to wall studs or masonry using fasteners appropriate to your wall construction, typically sixteen inches apart or at each stud location. For stud walls, use three-inch wood screws or quarter-inch lag bolts through wall angles into studs. For masonry or concrete walls, use quarter-inch concrete anchors or powder-actuated fasteners spaced sixteen inches apart. Ensure fasteners penetrate at least one and one-half inches into solid substrate to support the weight of ceiling tiles and t-grid components. Proper fastening prevents wall angle movement and keeps your t-grid installation secure.